Showing posts with label organization. Show all posts

Tuesday, July 1, 2014

Get Yourself Organized!

One of the things I'm vowing to work on this summer is relabeling all my binders. During the course of the year, it's easy to just throw things into a binder and be done with it. I wanted to be able to have a more organized way to keep my things straight, so I created new binder covers and coordinating spines that go with my brights and black/chalkboard theme. (Okay, so it's not a theme... But I just LOVE those colors!)


To check them out in my TPT store, just click any of the images above!

I've put my binder covers (above) and my folder and notebook labels HALF OFF today and tomorrow only, so you can start getting organized for next year ASAP! 


(Click on the image to go to the product on my TPT page)

And because I want to give these away too, the first two people who comment with their email address will get BOTH the editable binder covers and the folder/notebook labels for FREE!

Have a great day! :)

Wednesday, June 25, 2014

Be a Guided Reading Master!

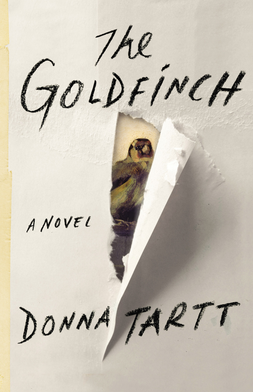
Hi everyone! We've officially been on break for a week, and it. Is. Glorious. I've had the opportunity to spend tons of time with my own kiddos at the Field Museum and the zoo, READ for myself (currently The Goldfinch... I'm liking it, but I quickly realized why it was taking FOREVER to move along on my Kindle... The book is nearly 800 pages!), and to fall asleep while putting my kids to sleep - and not feel guilty.

One thing I do want to make a concerted effort to do is to prep for next year way in advance so my to do list at the end of August isn't a mile long. Well, it probably will be anyways, but I'll make a dent while I'm much less stressed!

Anyways, one thing that was on my to do list ALL YEAR that is DONE is my leveled guided reading lesson plans!

Guided reading is hands-down my favorite part of the day. FAVORITE. It's such a great way to really interact with each student, to help them in a very specific way, and to see results from all our hard work.

One thing that kinda revolutionized my prep for guided reading was preparing lessons for each book, rather than for the group of students. It sounds kind of odd. We teach students, not the book, right? But in my personal and school library of guided reading books, I can think of very specific skills that align perfectly with certain books. For example, when my beginning of the year firsties need to work on predictions supported with information from the text, I pull out "Where's the Baby?" (in the AlphaKids series by Sundance... The best guided reading book ever. And it's a level D people!) When I know the book well, and have planned for that book well, I'm better at making quick instructional decisions with the students in front of me.

I feel like, especially as my students reach more challenging reading levels, I'm not always sure what skills are level-appropriate for my students. I want to make sure I'm using challenging teaching and questioning skills to really build up my students' abilities as readers and thinkers.

So, that's where these lesson plans come into play.


I've broken down skills in the following areas for each guided reading level from A through M:
  • Word work - I do this right before the lesson, and link it to words they'll find in the text
  • Vocab preview
  • Before reading - Activating prior knowledge, noticing text features, etc.
  • During reading - These are especially focused on accuracy, fluency, and self-monitoring for comprehension
  • After reading - With questions/skills that are more literal as well as higher-level
For an early kindergartener...


And for an early second grader...


Just add guided reading books and you'll be ready to go!

This pack can be found {HERE}, but I'll also give away a free copy to the first person to comment with their email address.

Have a great day!

Thursday, June 19, 2014

I've Always Loved the Idea of SUMMER... And SUN... And All Things HOT!!!

Phew! I can't believe today is finally here. It was my LAST day of school yesterday. We actually had the last day with students on Friday, but we had PD days until yesterday. There were times this year when I really wondered if I was going to make it to today!

Now, I've had a doctor's appointment (boo) and a pedi (yay!) and I'm feeling a bit refreshed already.

So, is it crazy to start working on a to-do list on the first day of summer? If so, I am nuts. :)

As a grade level, we decided we are going to try something new this school year. We have an Open House before school starts, where students and their families come in and find out who their teacher is. I usually put something kinda generic on the bulletin board (this year I'm thinking I might go with an Elephant and Piggie theme) where I post my students' names. But then, a week or two passes and I realize - OOPS! I need something else up on the bulletin board. So one of the girls on my team suggested maybe giving students "homework" at Open House and posting them on the board outside our rooms as they come back in. Genius!

So, I'm working on this:


(It's still a work in process, and I'm trying to find some good fonts with Spanish characters to use for my bilingual coworkers.)

Other things on my list?


Continue working on my notebook and folder labels to put on TPT. I have the ones I'm using for my class done, but I want to add some that I don't need but other TPTers might. (If you have any ideas, let me know!)

Make a book cover banner. I LOVE LOVE LOVE this one from Kinder-Craze!


Make new curtains for my shelves. Seeing all the junk on them drives me nuts, so I want to get them covered up! However, I don't sew, so we'll figure that out.

And I want to READ! I'm planning on reading:


And, of course, spends lots and LOTS of QT with my cuties! (My son turned 2 a couple weeks ago and my daughter turns 4 in August... It's crazy how quick time flies!)

Have a great rest of the week!

Friday, June 28, 2013

Classroom Library Organization 101

Well, I feel like I finally have the chance to sit down and blog! My students had their last day of school last week, then last Friday and this Monday, we had some grade level meetings to plan for next year. My room now looks like this:


(Yes, those are rough drafts of anchor charts - the version I do in front of the kids before rewriting them neatly - covering my shelves on the right. Reduce, reuse, recycle, right? :))

As I was packing up, the one area of the room that I could honestly sit back and say, "I love how this part of my room is set up!" is my classroom library. It's kind of evolved through the years, and it's definitely in the most manageable version yet as it is right now.

When I first started teaching first grade, I used a labeling system much like Beth Newingham's, in which each book had a detailed label (return address size) on the upper left corner. (I tried to find a picture but couldn't!) It was a bit challenging for my firsties to get their books back in the right bins.

So, over the course of a summer, I brought library books home for a relabel (which, trust me, isn't too fun!).

I used Un-du to peel off the old labels (this actually works pretty darn well! It's like Goo Gone but it works on paper).
(You can get it at scrapbook stores or on Amazon.)

Then I decided on the colors I'd use to label each major section of my library. I decided on yellow for my fiction books that aren't in series, green for my fiction books that are within a series or author (Biscuit books, books by Kevin Henkes, etc.), and blue for nonfiction books. I also have a small number of chapter books, which I labeled with pink stickers, and a bin of books in Spanish (both fiction and nonfiction), which I labeled with orange.

These are my fiction books (with yellow stickers), plus my leveled books. (The awesome Kristen from Ladybug's Teacher Files has FREE printable leveled book bin labels for both books and book bins.)
Some of my series books (with green labels).
Some of my nonfiction books (with blue labels). After I took the picture I realized that Abraham Lincoln book was majorly crooked, and it's driving me nuts in this picture!
Each of my book bin labels (see this post to download them free) has the colored, numbered sticker on it. I figured out what each of my book bins would be, then sorted them into fiction, series/author, and nonfiction, then just went in order numerically. The one problem is that it would be hard to add a bin into fiction, say, since the next bin after the last fiction bin is a series bin. Does that make sense?

Now, here's the key... Label each and every book with the same color sticker and number you used on the bin. I repeat... Label each book! I have had many teachers ask me how I get the books returned to the right bin, and this is absolutely key. I train students at the beginning of the year to understand the library organization, and within a couple weeks, my first graders can do this easily. (I have a librarian each week as a class job who is in charge of returning books to the library bins.)

A close up of a very popular bin (Elephant and Piggie). Note the numbered sticker on the bin.

And note the matching sticker on the book!
While you can get those colored dot stickers at office supply stores, I liked that I could buy them in individual color sets through Demco, a library supply site. They have bunches of sizes and colors. I also buy the clear stickers that are a little bigger to cover the number stickers.

Organizing my library was a major investment of time (almost entirely because I changed systems partway through my teaching career... Had I started from the beginning with this system, it would have been easy peasy!), but TOTALLY worth it, as even my young first graders can easily navigate the library, find books they need, and return books independently.

Hope this helps some of you get your library set up - or revamped! - for a new school year!

Tuesday, January 15, 2013

Getting Guided Math Up and Running

One of my goals this year was to revamp how I teach math and move toward guided math. I LOVE (with a huge heart!) guided reading, so why not do the same thing in math? I have tried to do guided math groups before, and feel like it always flopped. I'd try to teach the mini-lesson to my more advanced, average, and struggling kids in three separate mini-lessons, but that seemed like I was just repeating myself over and over (and over). I tried some pretty elaborate grouping, which then fell apart when kids finished early or needed independent work. So I thought about it and I think I have something that will work.

Note I said "will."

My firsties came to me doing SO GREAT in reading, but not-so-great in math. I noticed even my more advanced students struggled with lots of basic concepts, so I have spent the year thus far getting some basic skills and strategies in place, like counting on a number grid, number recognition, addition and subtraction strategies... The list goes on and on.

As soon as we returned from winter break, I gave all my students a guided math assessment to check what they knew. Now, this isn't exactly Common Core aligned... We use Everyday Math, and a lot of the key skills we've learned so far don't necessarily show up in the CCSS. So, it's more so aligned to the first four units in first grade Everyday Math.

(Click the pic to go to Google Docs and download the PDF)

Then, I created this spreadsheet (it's a PDF... Leaving it in word messed up formatting bigtime) to track how students did on each component.

Then, I looked at my students' scores, and created a readiness group (in my case, kids who had fewer than 8 points) and an enrichment group (kids with 8 or more points).  Within each group, I have groups of four students, or math teams, and each team has a leader. I'll describe these groups more in a later post, as well as what we'll be doing in our groups for mini-lessons, independent work, and math centers.

Hope these documents help! :)

Monday, September 17, 2012

Freebie labels!

Is anyone else OVERWHELMED with the year so far? I am! My room isn't quite how I want it to be yet, and I'm trying to get ahead (okay, who am I kidding? CATCH UP!) on planning and such. Our school day was extended this year, and while I'm LOVING the extra time, it's wearing me out a bit.

Anywhoooooo.....

Well, folks, these are probably superduper late for many of you, but maybe they'll be helpful for some of ya!

I've created six labels to label notebooks/folders for your kiddos, plus a bonus label for birthday books. (I give my students a book for their birthday. Many of my students don't have books at home, so I try to give my kiddos books for their birthdays, holidays, as rewards, etc.)

Click on the picture below to grab yours!


(Note: These can be printed on 4x3.33" labels. Make sure the page sizing is set to "none" so the labels print correctly.)

Monday, August 6, 2012

More Binder Covers!

I had a request for more binder covers that go with the black and white freebies in my TpT store, so I added more! There are three new ones:
Benchmark Assessments
Staff Information
Student Information
Grab them {HERE}.

(So this is ridiculously short, but I am in minor panic mode... Scrambling to set up my room + Open House on Thursday + kids coming Monday = AGH! I'll post more this week - hopefully with PICTURES of my finished classroom - and some more files for ya!)

Tuesday, July 24, 2012

More black and white stuff - a {FREE} clip chart!

So, I know I posted another clip chart previously, but I thought I'd make one in black and white to coordinate with those of you who do a black and white theme.

I also made the top two and bottom two levels smaller to make a shorter chart.


Just click {HERE} to download for free!

Thursday, July 19, 2012

MORE {FREE!} Binder Covers and Spines!

I've gone through and added some more binder covers and spines in the black and white theme. They're two separate FREE downloads in my TpT Store.

The covers/spines include:
Lesson Plans
Gradebook
Teacher Binder
Substitute Binder
Student Data
RtI Documentation
Parent Contact
IEP Information
Common Core


Just click {HERE} for the the lesson plan, gradebook, and teacher binder covers/spines. Click {HERE} for the sub binder, student data, common core, RtI, parent contact, and IEP covers/spines.

Enjoy!

Tuesday, July 17, 2012

{FREE!} Black and white binder covers

Just a quick update... I have made new binder covers! In the past I've had a teacher binder that contained ALL my important info (calendar, unit plans, lesson plans, gradebook, meeting notes, etc.), but it was ENORMOUS! This year, I'm moving to three separate binders (lesson plans, for unit and daily plans; gradebook; and a teacher binder for meeting notes, grade level forms, IEP info, student data, and other important info).

So I redid my binder covers. Here they are! I've also made a page with spines that you can trim to fit the size binder you'll be using.


The PDF you download won't have the annoying spelling squiggly line!


Go to my TpT store {HERE} to download your free copy!

Wednesday, July 11, 2012

FREE Classroom library bin labels

Just a quick post to share my classroom library bin labels!

Last year I changed my book baskets to the large, clear bins from School Specialty (although Lakeshore and other stores carry similar ones), to better show the covers of some of my larger picture books. Therefore, I redid my labels to the ones you see in this post.

I printed and glued each label to black cardstock, then attached a colored sticker (I buy mine from Demco.com, which is a library supply store) with a number for each bin to the right side of the label. All the books that belong in that basket have the matching color/number sticker in the top corner. (I'll update this post later once I'm back in my classroom and can take some pictures of my book bins and books!) Fiction books have yellow stickers, series/author books have green stickers, nonfiction books have blue stickers, and chapter books have pink stickers. You can see my library organization below (I have this sign posted in the classroom library area):

Click {HERE} to download my library organization list.

My library bin labels are in two downloads due to size:

Click to download:
Library Book Bin Labels Set 1
Library Book Bin Labels Set 2

Enjoy!

Friday, July 6, 2012

Ending the nameplate dilemma

Over the years, I've struggled with the best way to label kids' desk spots. I love those huge 18" nameplates that have space for the name plus all the reference information (letters/pictures, number grid, shape words, blah blah blah). So I usually would go buy something like this:


In a feeble attempt to get it to stick down for more than two seconds, I tried masking tape, contact paper, packing tape... You know the drill. But at least the kids were stuck with their own peeling nametag if they chose to destroy it.

Then a couple years ago, we got tables. They are FABULOUS! No room for my hoarders to stuff random papers. However, NOTHING stuck to them, until I found these at Lakeshore:

(So apparently, they're discontinued now... Oh well!)

They worked okay... They stuck down alright, but the kids would peel up the top clear plastic layer. You could slide nametags out, which was nice for moving kids at tables, but then kids who destroyed their nametag sleeve left behind a peely mess for the next kid.

I racked my brain for what to do for next year. Then I realized, why not make PLACEMATS, not nameplates, that could a) have the kid's name and b) all the important reference info but c) be moveable - kids could grab it if they need it, put it away if they don't, and - get this - keep the tables NEAT, CLEAN, and PEELY-FREE!

So I made this:


(Okay, so ignore my lame-o fake name... I didn't want to use a real name of a kiddo. I am so uncreative!)

The file is two pages. On the left, there's a nametag-looking space for the kid's name and number (if you use that). There's also an alphabet chart with letters and sounds.

On the right, there's a page with basic key info... Color words, number grid to 120 (love Common Core!), left/right hands, 2-D shapes, days of the week, months of the year, and number words 1-10.
I used a file folder, but you could also use 12x18" construction paper. Because I am a little Type A, I trimmed down the margins on the paper a tad so that each page would fit entirely into the folder. I also put a blank address label on the tab for the kid's name. I'll laminate these without a name written on them, then write the names on them after the fact with Sharpie. That way I can hopefully reuse them year after year by just using dry erase marker over the Sharpie to erase the permanent marker (love that trick!). My plan is to have a small file bin with one hanging folder per table. The table captain will pull those out at the beginning of the day, and kids can get them/put them back in their table's hanging file folder as needed.

If you want a copy of this for yourself, go ahead and click {HERE}. It's only $1.50 in my TPT store! But because I want to spread the love, the first two comments on this post (with email addresses) will get a free copy!

Have a great night!
Related Posts Plugin for WordPress, Blogger...